
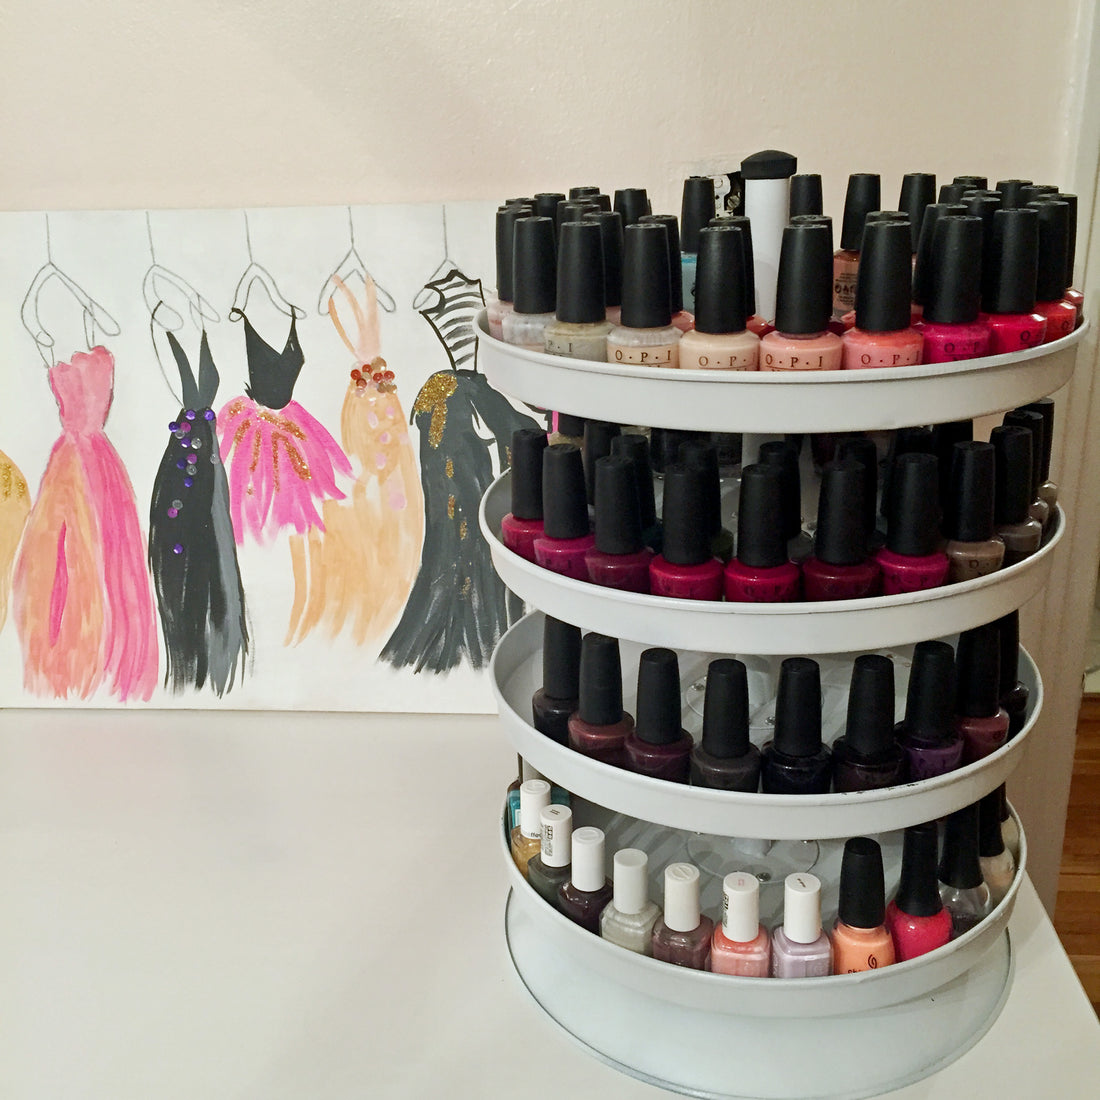
I've been on the hunt for the perfect nail polish storage solution for a LONG time. I have over 100 bottles of nail polish, so I needed something that would hold them all, plus let me see them easily. I've had them on a shelf for too long and the little guys in the back never get used because I can't see them.
I found this
rotating storage rack and thought it would be perfect. One little problem: it only came in black, and my dressing room is blush and white with gold accents. I decided to paint it white, and I'm so happy with the results. It's so easy to transform this industrial-looking piece into something perfect for any storage you may need!
The only thing you'll need is 2 cans of
spray paint in the color of your choice and the
rack. I wanted a glossy look so I made sure to get a paint with that finish.
Step 1: Lay out all of the pieces on a surface that you can paint on.

Step 2: Spray a thin coat of paint on every piece making sure to fully cover the surface.

Step 3: Let the first coat dry for at least 30 minutes then apply a second coat. Make sure that each piece is fully covered. Since the rack is black to begin with, you'll want to really cover each surface. You may need 3 coats depending on the type of paint you use and the color you choose.

Step 4: Flip over every piece and repeat steps 2 & 3.
Step 5: Fill it up with whatever you want to store, put it in its new home, and enjoy!

I'm so happy with how this storage rack turned out. The only problem now is that I don't have enough nail colors to fill it up! I just might have to remedy that situation. (:
I hope you enjoyed this tutorial. Send me pics of the DIY projects you're doing on Insta by tagging me
@thestylelaw or using #thestylelaw. Thanks for stopping by, lovelies!
Xoxo,
Sarah
 I've been on the hunt for the perfect nail polish storage solution for a LONG time. I have over 100 bottles of nail polish, so I needed something that would hold them all, plus let me see them easily. I've had them on a shelf for too long and the little guys in the back never get used because I can't see them.
I found this rotating storage rack and thought it would be perfect. One little problem: it only came in black, and my dressing room is blush and white with gold accents. I decided to paint it white, and I'm so happy with the results. It's so easy to transform this industrial-looking piece into something perfect for any storage you may need!
The only thing you'll need is 2 cans of spray paint in the color of your choice and the rack. I wanted a glossy look so I made sure to get a paint with that finish.
Step 1: Lay out all of the pieces on a surface that you can paint on.
I've been on the hunt for the perfect nail polish storage solution for a LONG time. I have over 100 bottles of nail polish, so I needed something that would hold them all, plus let me see them easily. I've had them on a shelf for too long and the little guys in the back never get used because I can't see them.
I found this rotating storage rack and thought it would be perfect. One little problem: it only came in black, and my dressing room is blush and white with gold accents. I decided to paint it white, and I'm so happy with the results. It's so easy to transform this industrial-looking piece into something perfect for any storage you may need!
The only thing you'll need is 2 cans of spray paint in the color of your choice and the rack. I wanted a glossy look so I made sure to get a paint with that finish.
Step 1: Lay out all of the pieces on a surface that you can paint on.
 Step 2: Spray a thin coat of paint on every piece making sure to fully cover the surface.
 Step 3: Let the first coat dry for at least 30 minutes then apply a second coat. Make sure that each piece is fully covered. Since the rack is black to begin with, you'll want to really cover each surface. You may need 3 coats depending on the type of paint you use and the color you choose.
 Step 4: Flip over every piece and repeat steps 2 & 3.
Step 5: Fill it up with whatever you want to store, put it in its new home, and enjoy!
Step 4: Flip over every piece and repeat steps 2 & 3.
Step 5: Fill it up with whatever you want to store, put it in its new home, and enjoy!
 I'm so happy with how this storage rack turned out. The only problem now is that I don't have enough nail colors to fill it up! I just might have to remedy that situation. (:
I hope you enjoyed this tutorial. Send me pics of the DIY projects you're doing on Insta by tagging me @thestylelaw or using #thestylelaw. Thanks for stopping by, lovelies!
Xoxo,
Sarah
I'm so happy with how this storage rack turned out. The only problem now is that I don't have enough nail colors to fill it up! I just might have to remedy that situation. (:
I hope you enjoyed this tutorial. Send me pics of the DIY projects you're doing on Insta by tagging me @thestylelaw or using #thestylelaw. Thanks for stopping by, lovelies!
Xoxo,
Sarah